php Xdebug环境搭建
php Xdebug环境搭建
linux+vscode+docker
环境配置:
系统:parrotsec家庭版
审计软件:vscode
代码语言:php
docker
使用dockerfile文件创建镜像
我这里使用的是其他人搭建好的dockerfile文件,如果有其他需要可以自行搭建,同时我把dockerfile内的php版本调整为7.3了
https://github.com/HACHp1/docker_php7_apache_xdebug.git
1 | docker build -t php7_xdebug . |

生成容器和映射web目录
1 | docker run -it -v /home/yuyan/Desktop/phpcode:/var/www/html -d -p 10086:80 --name php7_xdebug --restart=always 75a7a11b8671 |

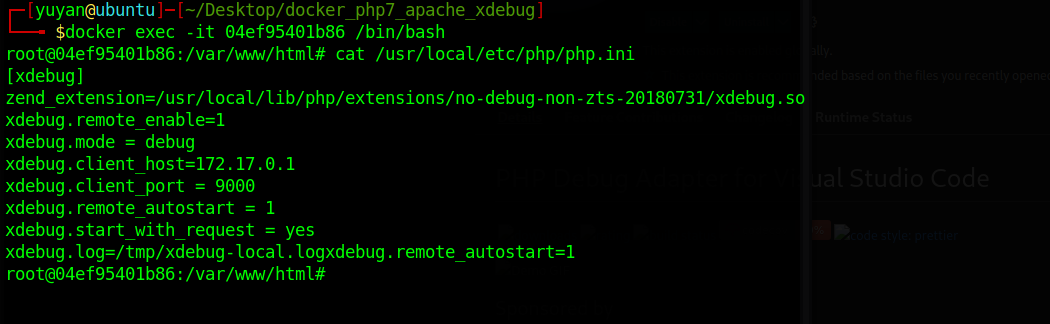
进入docker里调整xdebug.ini
这里的xdebug.so 和host需要视情况调整,不要盲目抄
1 | [xdebug] |
VSCODE
下载vscode
https://code.visualstudio.com/download
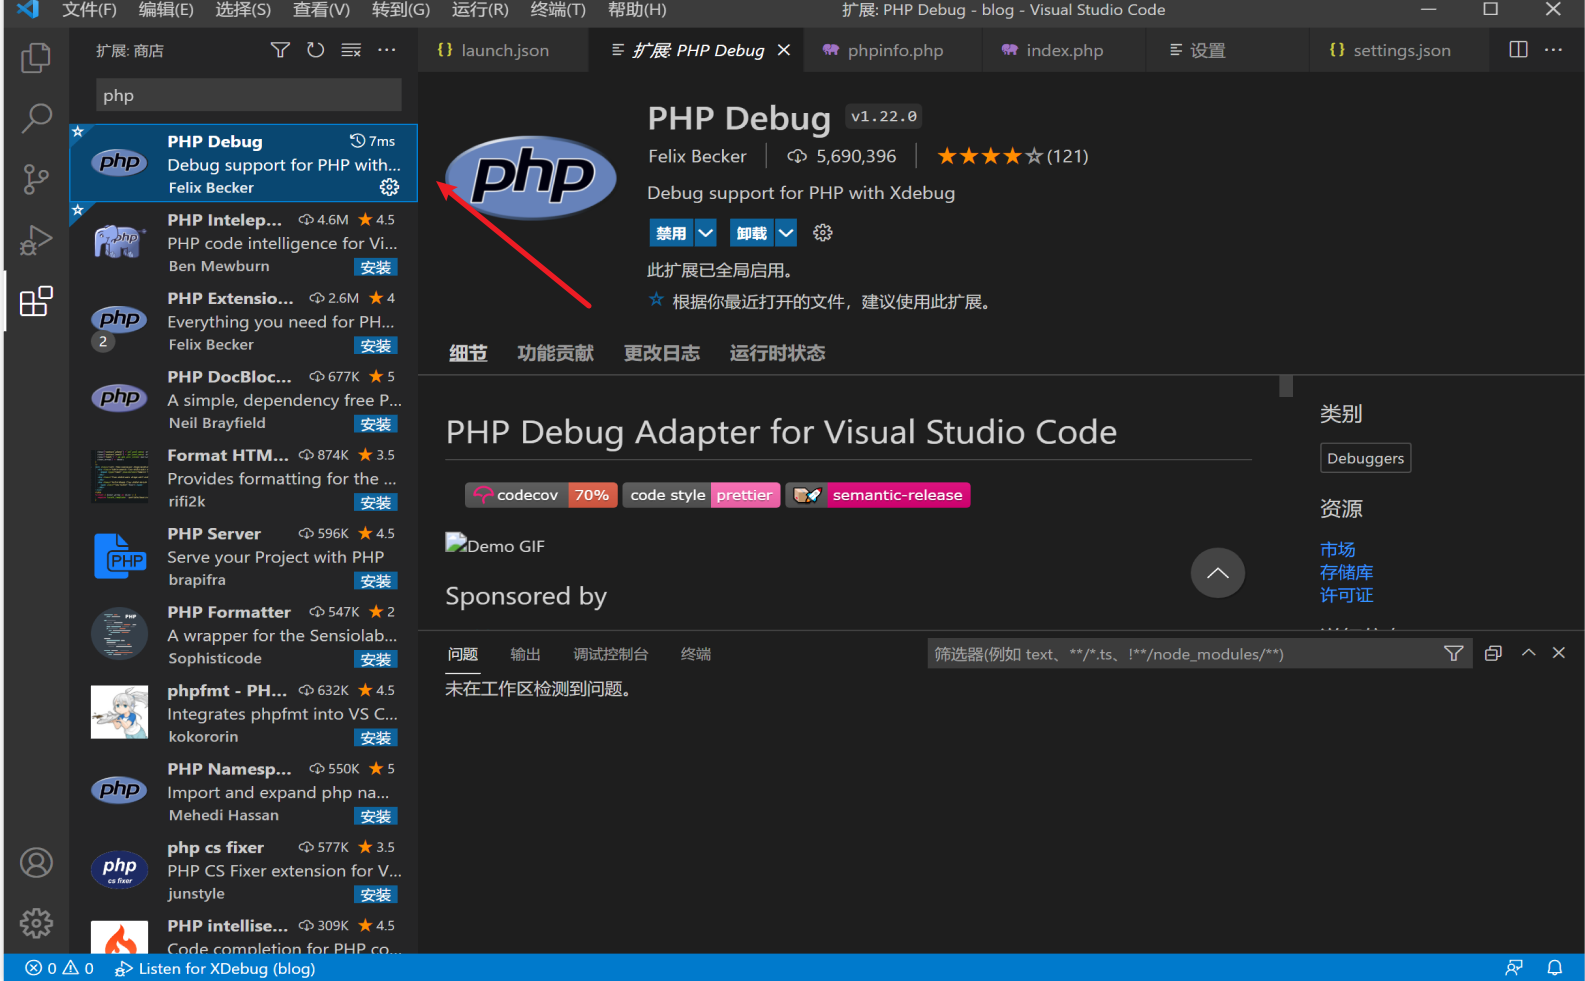
**下载好vscode之后进入插件市场下载php xdebug **
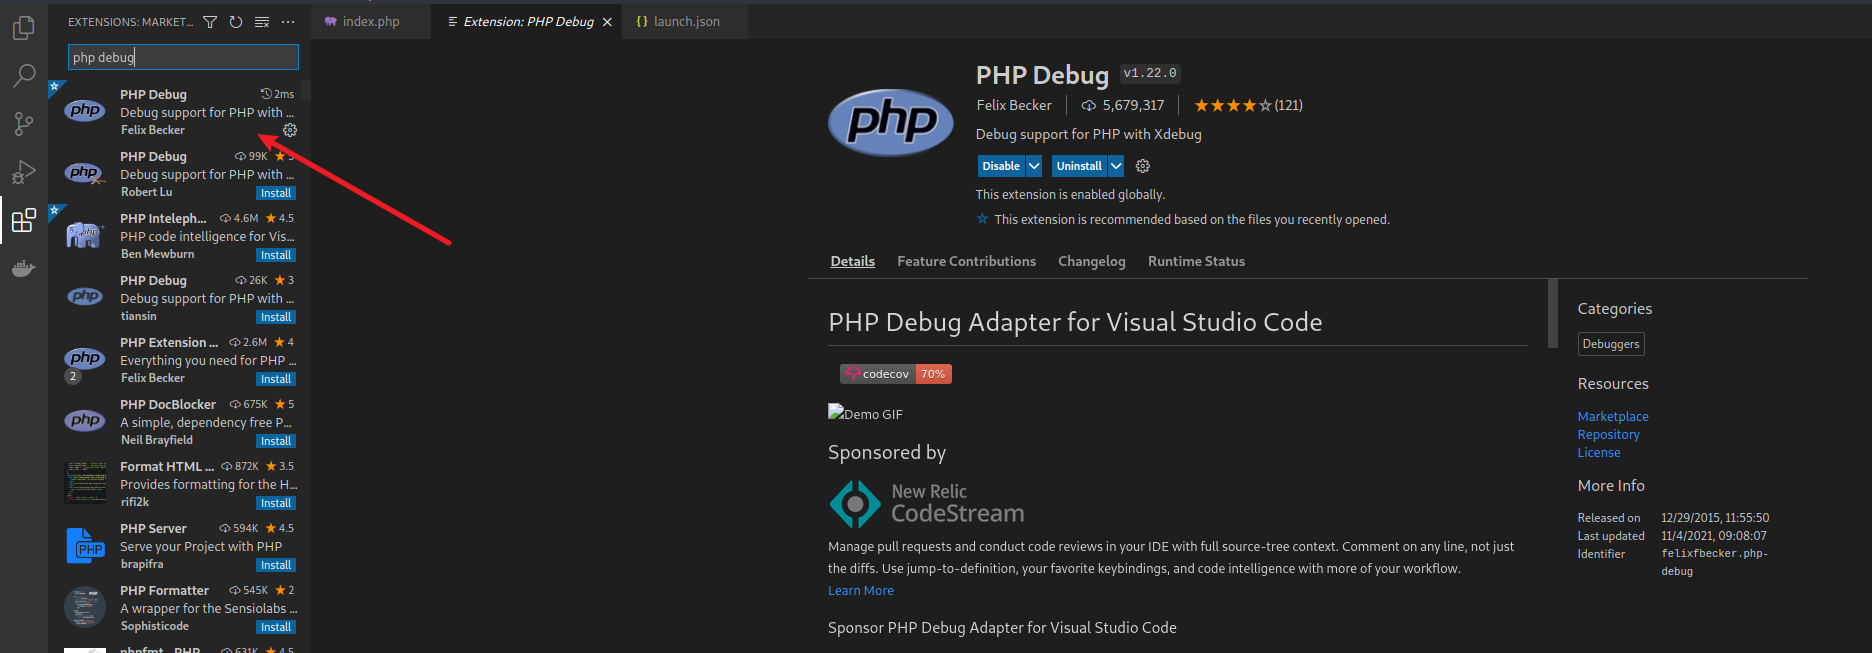
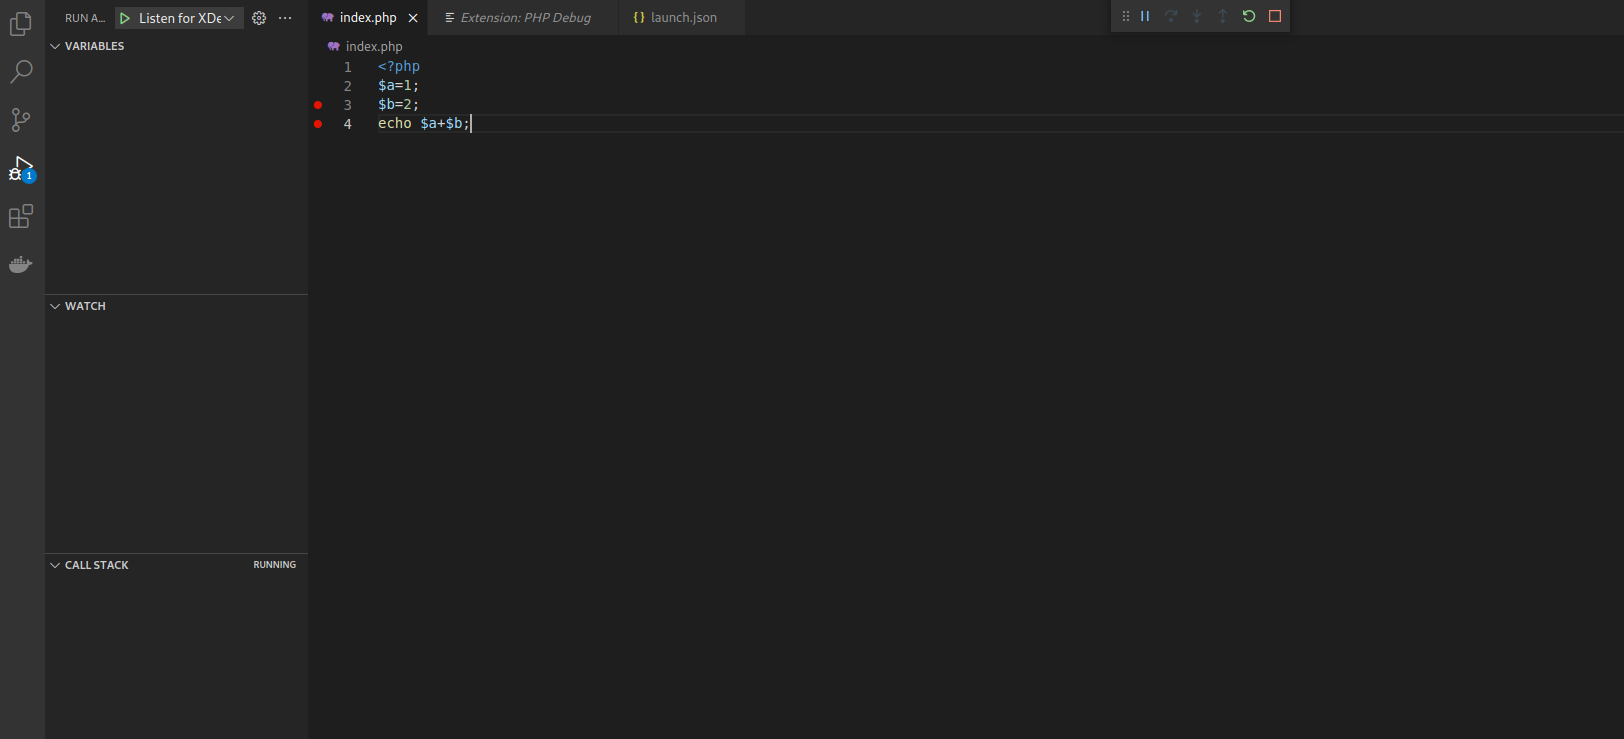
下载完后点击左侧第四个按钮,然后点击上方的小齿轮,进入launch.json

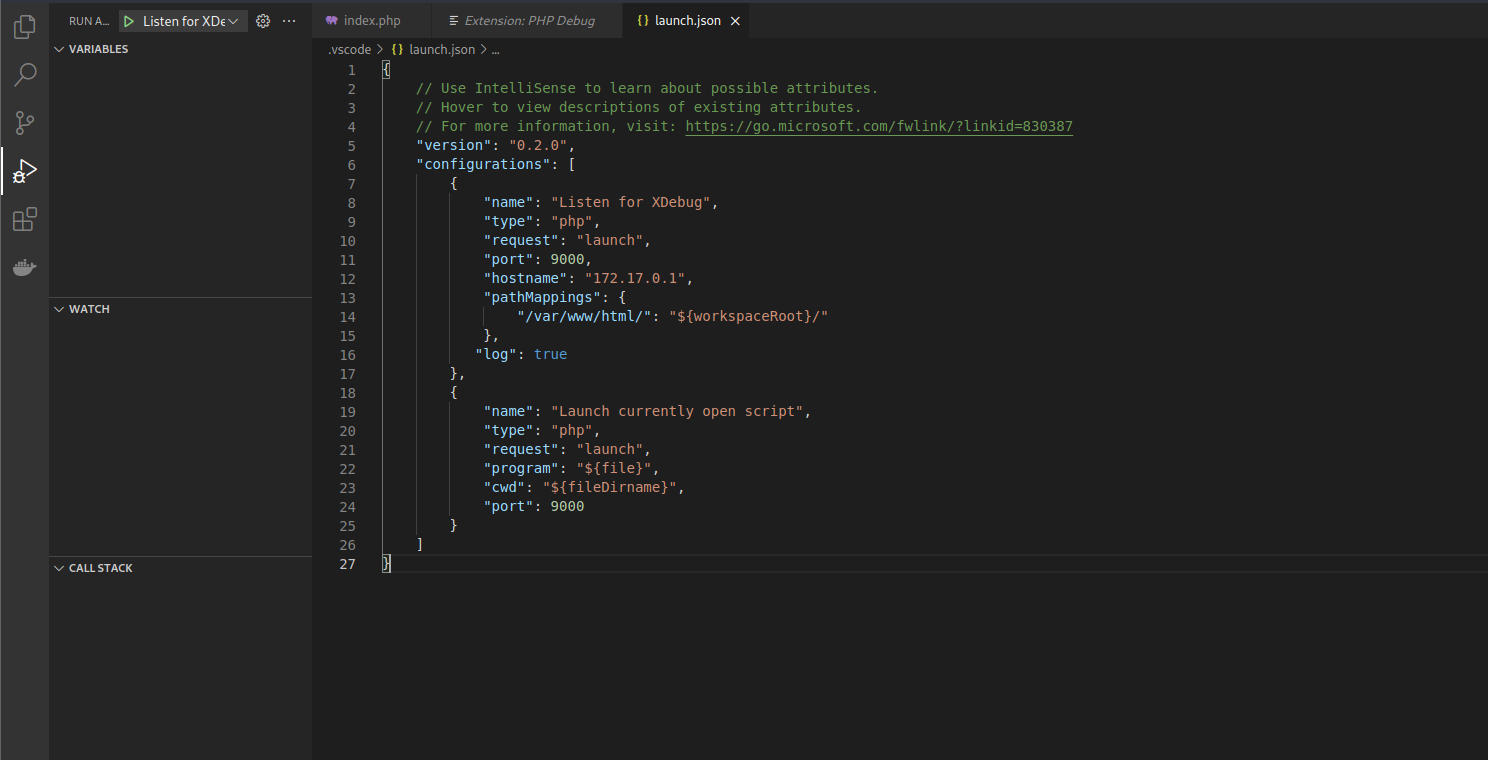
修改launch.json内容
端口需要跟docker内的php.ini文件一样设置
/var/www/html 是指docker内的WEB目录,docker内的目录怎么设置这里就怎么设置
修改完php.ini启动重启
1 | { |
浏览器
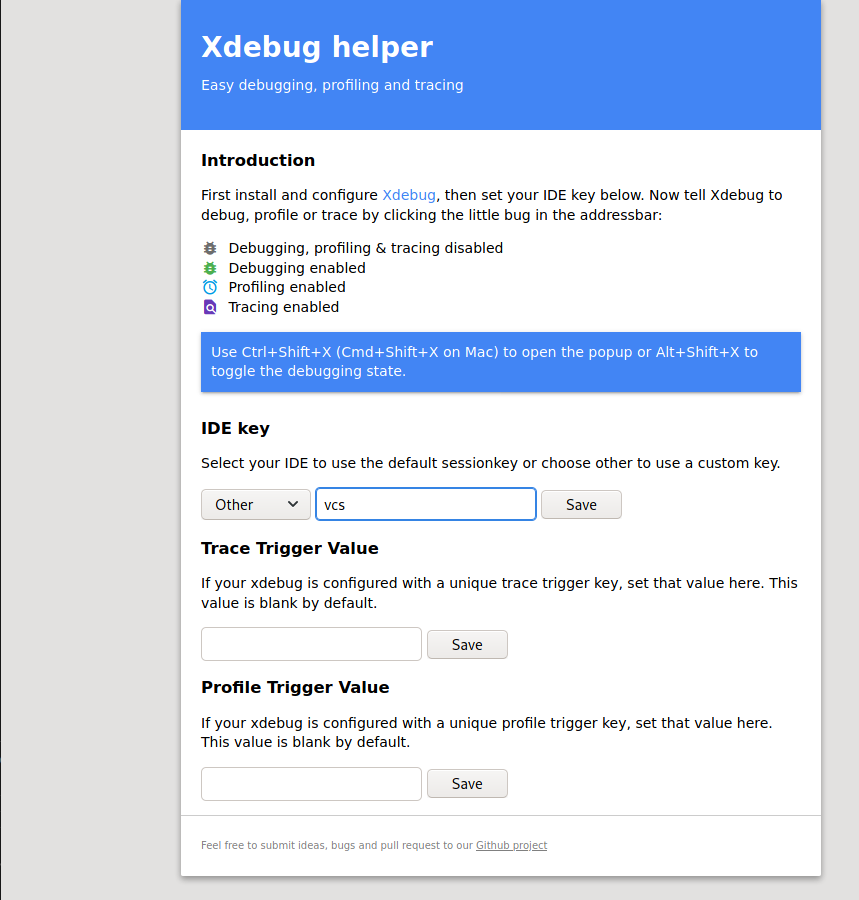
安装debug插件
我这里使用的是xdebug helper
https://addons.mozilla.org/en-US/firefox/addon/xdebug-helper-for-firefox/?utm_source=addons.mozilla.org&utm_medium=referral&utm_content=search
**设置ide key **//其实设不设置都一样的
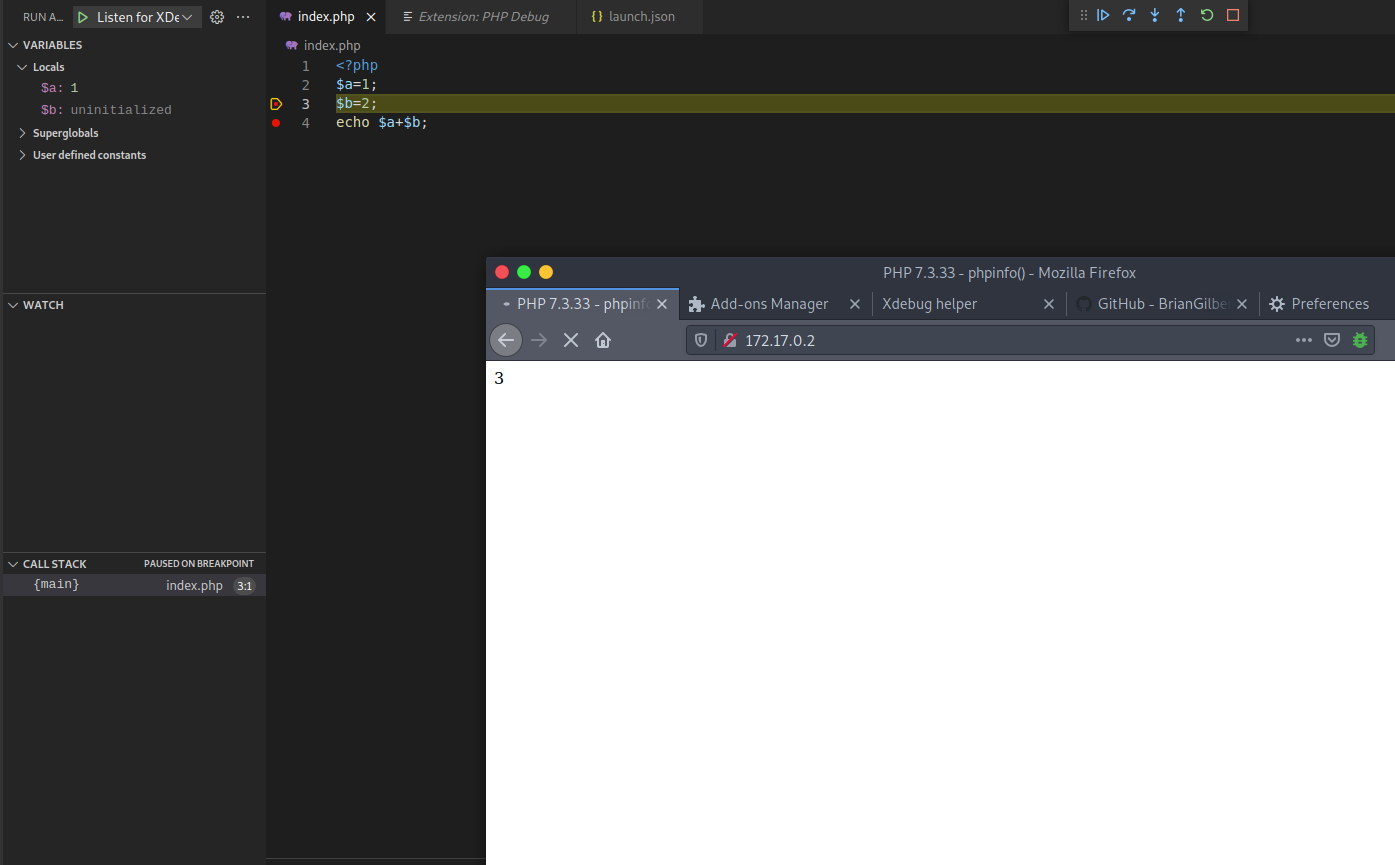
这时候进入vscode 按F5开始debug
使用浏览器访问就可以debug了
踩坑经验
如果vscode提示什么说本地没有php或找不到php环境,只能说你配置出问题了,不需要在本地安装一个php
如果断点没断成功看下你的映射目录是否就是docker环境的
不要没有映射就强行加载docker目录,如果你使用vscode加载docker目录(没有映射过的)会断点失败,使用vscode加载目录不需要root权限
修改完php.ini 记得重启
参考链接
https://hachp1.github.io/posts/%E7%8E%AF%E5%A2%83%E6%90%AD%E5%BB%BA/20190903-php7_xdebug.html
https://toggen.com.au/it-tips/xdebug-over-ssh-into-container/
phpstudy+vscode
phpstudy
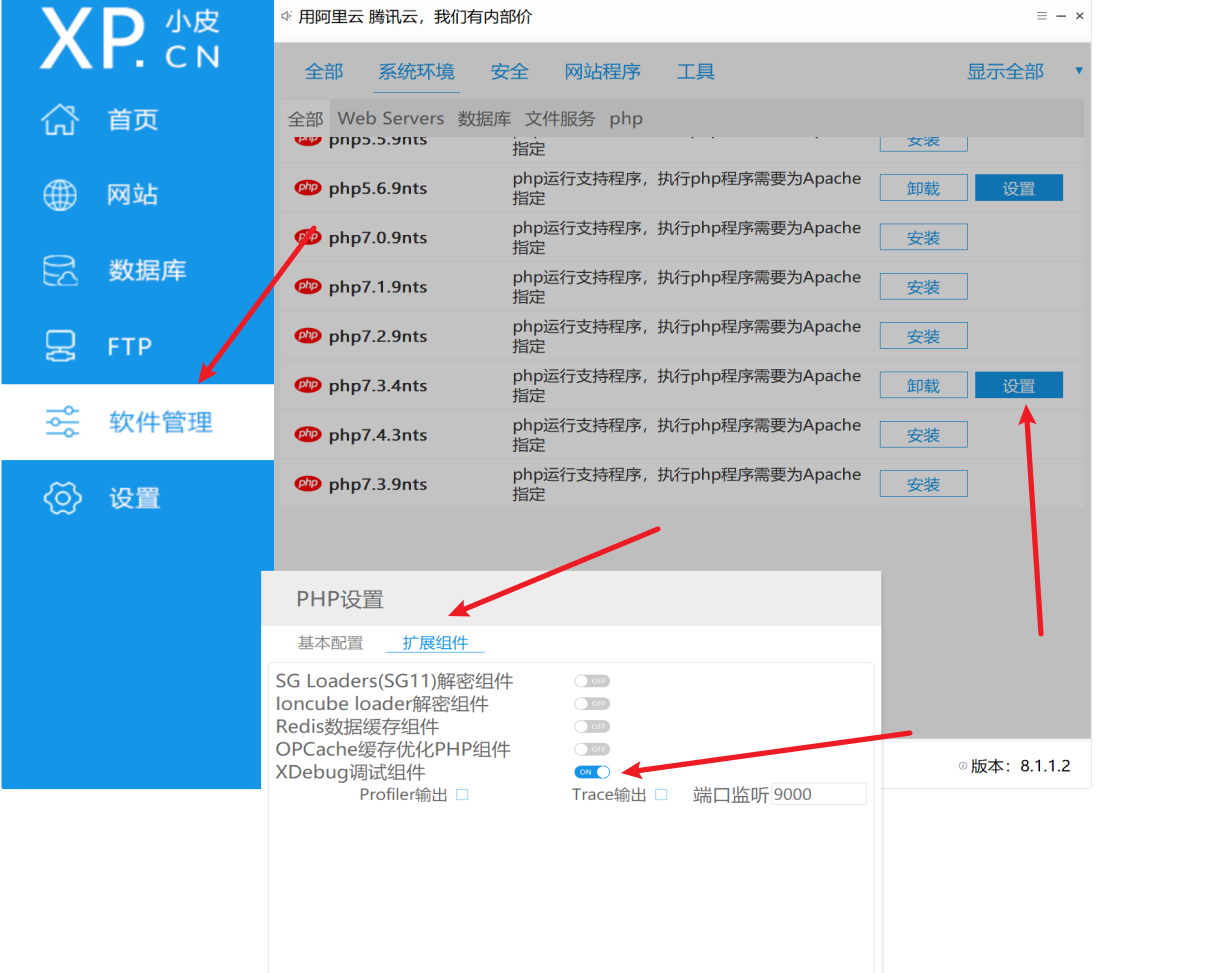
下载好phpstudy后开启xdebug
我这里就直接使用默认端口了,有需要可更改
修改php.ini
如果弄完后无法断点就需要修改
1 | xdebug.remote_enable=On //将默认的off修改为on |
VScode
进入插件市场下载phpdebug 插件
添加launch.json
将下面的内容添加到json
保存完重启phpstudy
1 | { |